How to Introduce New Chickens to Flock: Step-by-Step (Without Bloodshed)
Adding new birds to an established flock is one of the trickiest parts of keeping chickens. Chickens are hardwired to enforce a strict social hierarchy — the literal “pecking order” — and a new bird dropped in without preparation can trigger serious bullying, injury, or worse. The good news is that with patience and the right process, you can integrate new chickens with minimal drama. Here’s exactly how to do it.
Why You Can’t Just Toss New Chickens In
Established flocks have already worked out who’s dominant and who’s subordinate. A stranger — especially one that shows up overnight with no warning — reads as a threat to that order, and the existing flock will often gang up to reassert control. Rushing this process is the single most common cause of introduction injuries, so slow down even when you’re excited about your new birds.
Step 1: Quarantine New Birds for 30 Days
Before your new chickens meet the existing flock at all, they need a solid 30-day quarantine in a completely separate space — different housing, different food and water containers, and ideally handled after you’ve cared for your existing flock, not before (to avoid tracking pathogens on your hands, boots, or clothes).
Thirty days matters because many poultry diseases and parasites — respiratory illnesses, mites, lice, coccidiosis, Marek’s disease — have incubation periods that can stretch several weeks. A bird that looks perfectly healthy on day one can start showing symptoms on day 20. Skipping quarantine, or cutting it short to two weeks, is gambling with your entire existing flock’s health.
During quarantine, watch for:
- Nasal discharge, sneezing, or labored breathing
- Lethargy or reduced appetite
- Abnormal droppings
- Visible mites, lice, or scaly leg mites
- Comb color changes
If your new birds are coming from a reputable, tested source, you can feel more confident, but quarantine is non-negotiable even then — it protects a flock you’ve likely invested months or years into building.
Step 2: The See-But-Don’t-Touch Method
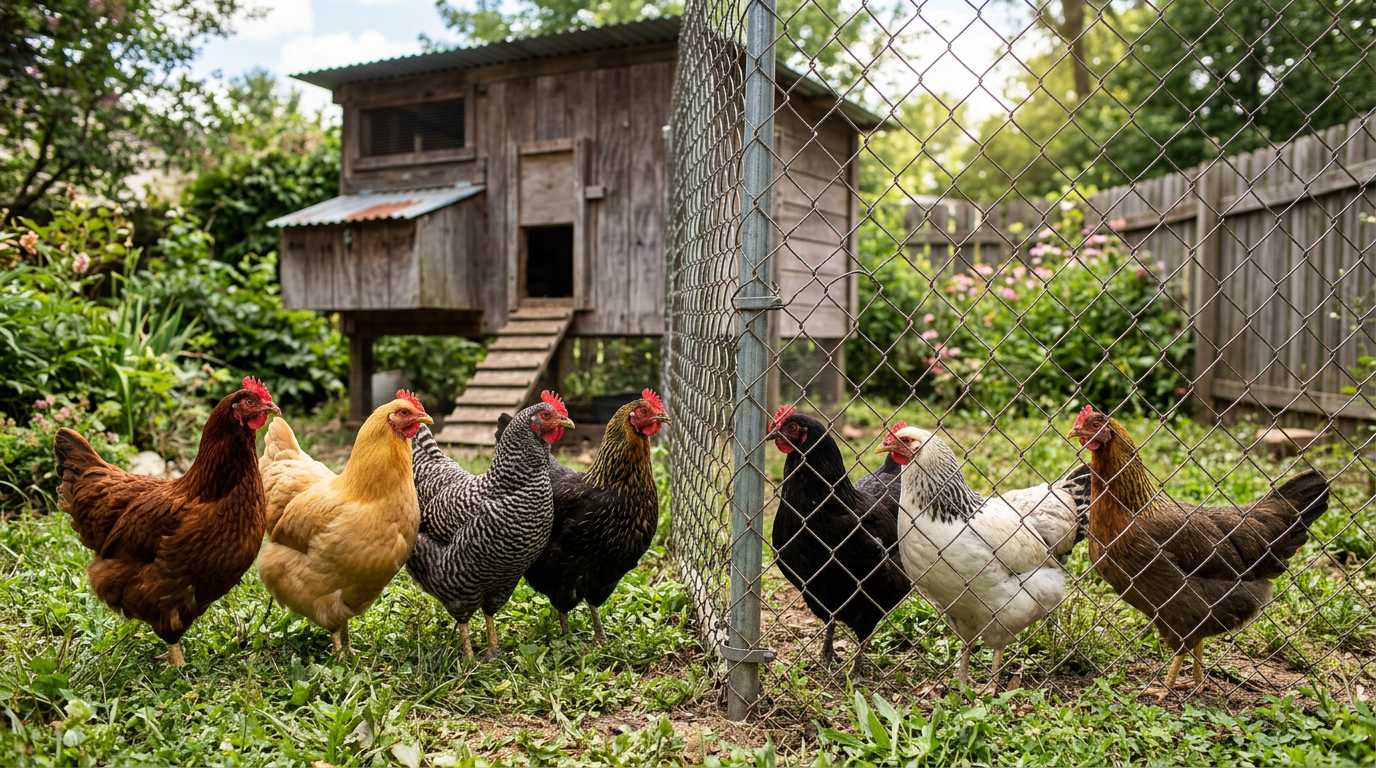
Once quarantine is complete and the new birds are healthy, don’t jump straight to a shared pen. Instead, set up housing where the two groups can see, hear, and smell each other without physical contact — for example, a wire dog crate or a wire-partitioned section inside the run. This lets both groups get used to each other’s presence and reduces the “stranger danger” reaction that fuels aggressive pecking.
Keep this side-by-side setup going for at least a week, longer if you notice a lot of pacing, aggressive posturing, or squawking through the barrier. You want the initial excitement and threat displays to fade into indifference before moving to the next step.
What to Look For During This Phase
- Reduced interest or aggression through the barrier over time (good sign)
- Both groups eating and resting normally nearby each other
- Persistent aggressive displays even after a week (proceed more slowly)
Step 3: Supervised Free-Range Meetings
Once the barrier phase is calm, allow supervised time together in a neutral, open space — ideally somewhere with plenty of room to retreat, multiple feeding and watering stations, and hiding spots like bushes or coop furniture. Avoid tight spaces or narrow runs where a subordinate bird can get cornered.
Keep these sessions short at first — 15 to 30 minutes — and always supervised so you can intervene if things escalate. Gradually increase the time together over several days as the flock settles into a new hierarchy. Some chasing, posturing, and pecking toward the head/neck to establish rank is normal and expected; this is different from sustained, targeted attacks.
Step 4: The Nighttime Introduction Trick
A well-known trick among experienced keepers: once you’re ready to fully merge the flocks, move the new birds onto the roost after dark, once the existing flock is already asleep. Chickens are calm and less reactive at night, and when they wake up in the morning, the new arrivals are already part of the “scenery” rather than a sudden intrusion. This doesn’t replace the earlier steps, but it’s an effective final move to reduce first-morning conflict when you make full introduction permanent.
Understanding the Pecking Order: Normal vs. Bullying
Some conflict is a healthy, necessary part of establishing a new hierarchy. The challenge is telling normal pecking order behavior apart from dangerous bullying.
Normal Pecking Order Behavior
- Brief chases that end once the subordinate bird moves away
- Occasional pecks toward the head or back with no blood drawn
- A new bird eating last or waiting for space at the feeder
- Posturing — puffed feathers, raised hackles — without follow-through contact
Signs of Dangerous Bullying — Intervene Immediately
- Drawing blood, or repeated pecking at the same wound
- A bird being cornered with no escape route and continuously attacked
- One bird being prevented from accessing food or water entirely
- Group “ganging up” — multiple birds targeting one at once
- A bird hiding constantly, refusing to come out, or showing signs of stress like weight loss
If you see blood, separate the injured bird immediately — other chickens are drawn to red and will peck at a wound relentlessly, which can escalate to serious injury or death very quickly. Treat the wound, keep the bird separated until healed, and reintroduce it more gradually using the barrier method again.
Timeline Expectations: What’s Normal
Full integration realistically takes two to four weeks from first supervised meeting to a settled, unified flock. Some general milestones:
- Week 1: Barrier introduction, minimal direct contact
- Week 2: Short supervised meetings, some chasing and posturing
- Week 3: Longer unsupervised time together, hierarchy starting to settle
- Week 4: Flock roosting, eating, and free-ranging together with occasional minor disputes
Younger or smaller birds, and single new additions rather than pairs or small groups, tend to take longer and face more pressure — introducing two or more new birds together gives them safety in numbers and often speeds up the process.
Special Considerations for Roosters
Introducing a new rooster is higher stakes than introducing hens. Two mature roosters in the same flock will often fight for dominance, sometimes seriously, especially if the flock doesn’t have enough hens or space to reduce competition. If you’re adding a rooster to a flock that already has one, expect a real fight for dominance and be prepared to separate them permanently if injuries escalate beyond typical posturing. Extra space helps enormously here — reviewing your coop and run square footage before adding a second rooster is worth doing, since crowding is one of the biggest triggers for rooster aggression.
Setting Your Flock Up for Long-Term Success
Adding multiple feeding stations, water sources, and roosting spots throughout the coop and run reduces resource competition, which is the root cause of most integration conflict. If you’re planning ahead for future additions, it’s worth building or buying a coop with some extra capacity from the start — check our chicken coop and run plans for layouts that leave room to grow. And if you’re still working out your ideal flock size before adding new birds, our guide on how many chickens beginners should start with can help you plan numbers that scale well over time.
Final Thoughts
Successful flock integration is really about patience disguised as a process. Quarantine protects health, the see-don’t-touch phase reduces panic, supervised meetings let a new order form safely, and the nighttime trick smooths over the final transition. Skip steps and you’re gambling with stress, injury, or worse — follow them, and most flocks settle into a peaceful new normal within a month.