How to Winterize Your Chicken Coop: 9 Steps Before the First Frost
Every year, the first hard frost catches someone off guard. Chickens are tougher than most people think — most breeds handle temperatures well below freezing without trouble — but they need a dry, draft-free, well-ventilated coop to do it safely. The difference between a flock that cruises through January and one that battles frostbitten combs and frozen waterers comes down to preparation you do before cold weather arrives.
Here are nine steps to winterize your chicken coop, starting with the one that matters most.
Step 1: Fix Your Ventilation (The #1 Winter Mistake)
This is counterintuitive, so read it twice: the biggest winter threat to your chickens is not cold air — it is moisture. A sealed-up, “warm” coop traps the water vapor that chickens exhale (each hen produces roughly half a pint of moisture per day through breathing alone) and the ammonia from droppings. That trapped humidity condenses on combs, wattles, and toes, and when temperatures drop, condensation turns to frostbite.
Proper ventilation allows moist, stale air to escape while keeping direct drafts off the roosting birds. The rule of thumb is a minimum of 1 square foot of ventilation opening per bird, positioned near the roofline or at the gable peaks — well above roost height.
Ventilation vs. Draft: Know the Difference
| Ventilation (Good) | Draft (Bad) |
|---|---|
| Air moves gently overhead, carrying moisture and ammonia up and out | Cold air blows directly across roosting birds at body level |
| Located at the top of the walls, ridge, or gable | Gaps, cracks, or openings at roost height or below |
| Keeps the coop dry even on the coldest nights | Chills birds and causes wind-chill frostbite |
| Should remain open year-round, even in sub-zero weather | Should be sealed with caulk, weatherstripping, or hardware cloth |
If you are designing or building a coop, plan for generous ventilation from the start. Retrofitting vents into an existing structure is possible but more difficult.
Step 2: Insulate Strategically, Not Obsessively
Insulation helps retain the heat your flock generates (a single chicken produces about 10 BTUs per hour), but over-insulating — especially when combined with sealed vents — creates a moisture trap that does more harm than good.
Focus insulation on the north and west walls, which take the brunt of winter wind in North America. Rigid foam board (1 to 2 inches of XPS or EPS) covered with plywood or OSB is effective and affordable. Always cover insulation with a solid surface; exposed foam will be pecked apart within hours. The type of wood you used also affects how well your coop handles freeze-thaw cycles.
Leave the ceiling and upper walls uninsulated if your ventilation openings are there. Insulation works with ventilation, never instead of it.
Step 3: Prevent Condensation and Frostbite
Frostbite on combs and wattles is the most common cold-weather injury in backyard flocks, and it is almost always caused by moisture rather than temperature alone. Chickens can handle dry cold remarkably well — many heritage breeds tolerate temperatures down to 0 degrees F without issue — but add humidity and even 25 degrees F becomes dangerous.
Beyond ventilation, take these extra steps:
- Use wide, flat roosts (2×4 lumber laid flat) so chickens can cover their toes with their body feathers while sleeping.
- Apply a thin coat of petroleum jelly or coconut oil to large combs and wattles before a hard freeze. This creates a moisture barrier.
- Check for roof leaks and wall seepage before winter. Even a small leak adds moisture to the coop air around the clock.
- Move waterers outside the coop or onto a drip tray to keep spilled water from raising indoor humidity.
Step 4: Set Up a Heated Waterer (Or a DIY Alternative)
Chickens need access to liquid water at all times, even in freezing weather. A dehydrated hen stops laying and becomes vulnerable to illness. You have several options:
- Heated poultry waterer base: An electric base that sits under a standard galvanized or plastic waterer. Most draw 40 to 60 watts, costing roughly $3 to $5 per month to run. This is the most reliable option.
- Horizontal nipple waterer with heat tape: Wrap the supply line and nipple housing with thermostatically controlled pipe heat tape. Keeps nipples from freezing and prevents the humidity problems caused by open waterers.
- Ping-pong ball method: Float a ping-pong ball in an open waterer. Wind and chicken activity keep the ball moving, which slows ice formation. This works in mild freezes (28 to 32 degrees F) but will not prevent solid freezing.
- Rotate waterers manually: Bring a fresh waterer out every few hours and take the frozen one inside to thaw. Labor-intensive but requires zero electricity.
Step 5: Switch to Deep Litter for Extra Warmth
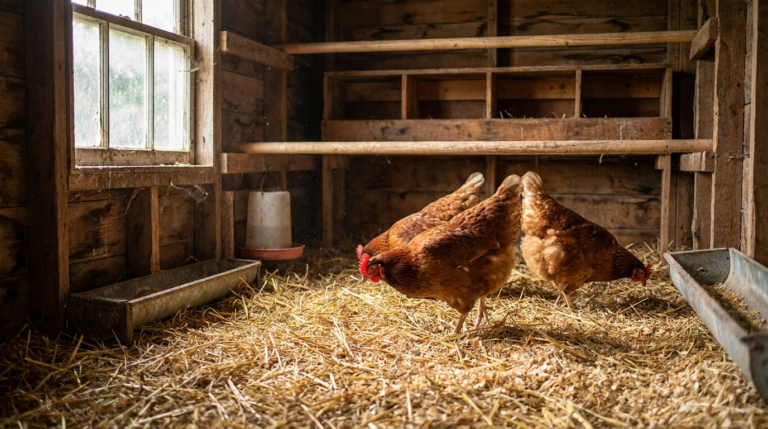
The deep litter method — layering carbon-rich bedding (pine shavings, chopped straw, dried leaves) over manure and letting beneficial microbes compost it in place — is a natural winter ally. The composting process generates measurable heat, raising the floor temperature by as much as 10 degrees Fahrenheit compared to bare or thinly bedded floors.
To prepare deep litter for winter:
- Start building the litter bed in early fall (September or October) so the microbial colony is established before hard freezes arrive.
- Maintain a depth of 8 to 12 inches through winter.
- Add fresh shavings on top whenever you see droppings accumulating on the surface.
- Toss scratch grain into the litter daily to encourage chickens to turn it, keeping the compost aerobic.
Deep litter requires adequate ventilation to manage the moisture it produces. If your coop does not have good airflow overhead, this method can backfire and increase humidity. Get the ventilation right first (Step 1), then deep litter becomes one of the best low-cost heating strategies available.
Step 6: Adjust Feed for Cold-Weather Energy Demands
Chickens burn significantly more calories in winter just to maintain body temperature. A laying hen in summer needs roughly 250 to 300 calories per day; in winter, that number can climb to 350 to 400 calories depending on temperatures and breed.
- Keep layer feed available free-choice. Do not restrict feed in winter.
- Offer a handful of cracked corn or scratch grain in the evening. Digesting whole grains generates metabolic heat through the night. This is not a myth — the thermic effect of digestion is real and measurable.
- Add a protein boost during molting. Birds that molt late into fall need extra protein (18 to 20 percent) to finish feathering out before winter. Consider black soldier fly larvae, sunflower seeds, or a higher-protein game bird feed as a supplement.
- Provide warm (not hot) oatmeal on extreme cold mornings. A quick calorie boost helps birds start their day. Keep servings small enough that they finish within 15 to 20 minutes to avoid attracting rodents.
Step 7: Add Supplemental Lighting for Egg Production
Hens need 14 to 16 hours of light per day to maintain peak egg production. In northern latitudes, winter daylight can drop below 9 hours, causing most hens to slow or stop laying entirely. If you want eggs through winter, supplemental lighting is the solution.
- Use a low-wattage LED bulb (9 watts is plenty for a standard coop) on a timer.
- Add light in the morning, not the evening. Setting the timer to turn on at 4:00 or 5:00 AM and off at natural sunrise gives hens a gradual transition to darkness at dusk rather than a sudden blackout. A sudden lights-out can leave birds stranded on the floor instead of the roost.
- One light point is enough for coops up to 64 square feet. Larger coops may need two.
- Some keepers choose to let hens take a natural winter break from laying. This is a personal choice. There is no evidence that supplemental lighting harms healthy birds, but the rest period may benefit older hens.
Step 8: Draft-Proof and Check the Structure
With ventilation open at the top, your job is to make sure unwanted air is not entering at bird level. Walk around the coop and look for:
- Gaps around doors and pop holes. Install adhesive-backed foam weatherstripping on door frames. For pop holes, consider a wind-proof flap made from heavy rubber or overlapping strips of vinyl.
- Warped or shrunk boards. Wood shrinks over summer. Fill new gaps with caulk or expanding foam, then trim flush.
- Hardware cloth windows. In winter, cover hardware cloth openings on the windward side with clear polycarbonate panels or heavy-mil plastic sheeting, leaving the leeward side open for ventilation.
- Floor-level cracks. Especially in raised coops, inspect where the floor meets the walls. Pack any gaps with steel wool (to deter rodents) and seal with caulk.
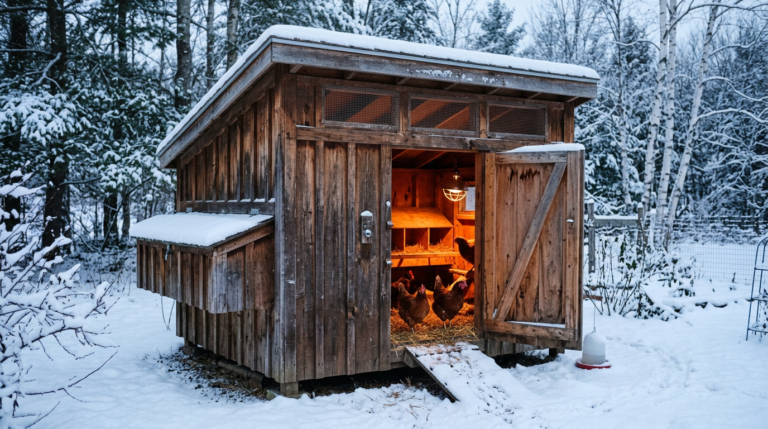
Step 9: Assess Snow Load on the Roof
A cubic foot of fresh snow weighs 5 to 10 pounds. Wet, packed snow can weigh 20 pounds or more per cubic foot. A 4×8-foot coop roof can accumulate hundreds of pounds of snow in a single storm, and most backyard coops are not engineered for heavy loads.
- Ensure a minimum roof pitch of 4:12 (4 inches of rise per 12 inches of run) so snow slides off rather than accumulating.
- Inspect rafters and ridge beams for cracks, rot, or previous sagging. Reinforce with sister joists if needed.
- Clear heavy snow promptly. After a major storm, use a roof rake or broom to pull snow off before it compacts.
- Check that the coop is level. A leaning coop sheds snow unevenly, overloading one side.
If you are in a region with consistent heavy snowfall, our climate-tested coop plans include roof engineering rated for snow loads up to 40 pounds per square foot.
When NOT to Heat Your Coop
This is the most controversial topic in cold-weather chicken keeping, and the answer is straightforward: in most situations, you should not add a heat source to your coop.
Here is why:
- Fire risk. Heat lamps are the number one cause of coop fires. The Consumer Product Safety Commission has documented numerous barn and coop fires caused by heat lamps falling into bedding. A 250-watt heat lamp in a wooden structure filled with dry bedding is a genuine danger.
- Dependency. If your flock acclimates to a heated coop and the power goes out during a storm, the sudden temperature drop can shock or kill birds that never developed their full cold-weather feathering.
- Unnecessary for most breeds. Breeds like Plymouth Rocks, Orpingtons, Wyandottes, Australorps, and Rhode Island Reds are cold-hardy to well below 0 degrees F. Even Mediterranean breeds like Leghorns handle cold better than most people expect when the coop is dry and draft-free.
When heating IS justified: If you keep tropical breeds (Seramas, Silkies with wet feathering) or if temperatures routinely drop below -20 degrees F, a flat-panel radiant heater (not a heat lamp) mounted to the wall is the safest option. These heaters run at low wattage, do not produce open flame, and cannot ignite bedding if they fall.
Your Winterization Checklist
| Task | When to Do It | Priority |
|---|---|---|
| Inspect and clear ventilation openings | Early October | Critical |
| Seal drafts at bird level | Early October | Critical |
| Start deep litter buildup | September | High |
| Install heated waterer or heat tape | Before first freeze | High |
| Insulate north and west walls | October | Medium |
| Set up supplemental lighting timer | When daylight drops below 14 hours | Medium |
| Check roof structure and pitch | October | Medium |
| Adjust feed (add scratch grain) | When lows consistently hit freezing | Medium |
| Apply petroleum jelly to combs | Before hard freeze nights | Low (breed-dependent) |
Frequently Asked Questions
What temperature is too cold for chickens?
Most cold-hardy breeds (Orpingtons, Wyandottes, Plymouth Rocks, Rhode Island Reds) tolerate temperatures down to 0 degrees F and even below without supplemental heat, as long as the coop is dry and draft-free. Tropical and light-feathered breeds may struggle below 20 degrees F. The key factor is moisture, not temperature alone — a dry coop at 10 degrees F is safer than a damp coop at 30 degrees F.
Should I close all the coop windows in winter?
No. Closing all openings traps moisture and ammonia inside, which causes respiratory disease and frostbite. Keep ventilation openings near the roofline open year-round, even in sub-zero weather. Only close or cover openings at bird level that create direct drafts across the roost.
How do I keep chicken water from freezing without electricity?
Insulated waterer covers, black rubber tubs that absorb solar heat, the ping-pong ball method (which slows surface ice formation), and frequent manual water swaps are all non-electric options. In hard freezes below 25 degrees F, most non-electric methods only delay freezing rather than prevent it entirely. Rotating two waterers — one thawing inside while the other is in the coop — is the most reliable no-electricity approach.
Do chickens need a heat lamp in winter?
In the vast majority of cases, no. Heat lamps are the leading cause of coop fires and create a dependency that puts birds at risk during power outages. Cold-hardy breeds are well-equipped for winter with their down undercoat. Focus on ventilation, draft-proofing, and deep litter instead. If you must provide heat for tropical breeds or extreme sub-zero conditions, use a flat-panel radiant heater rather than a heat lamp.
When should I start winterizing my chicken coop?
Begin in September with deep litter buildup and a structural inspection. Complete draft-sealing, insulation, and heated waterer installation by mid-October in northern climates (USDA zones 3 through 5) or by early November in zones 6 and 7. Starting early gives you time to order supplies and make repairs before cold weather forces rush decisions.
A well-designed coop makes winterization straightforward. Our DIY coop plans include built-in ventilation, insulation-ready wall cavities, and snow-load-rated roofs so you are not retrofitting every fall. Browse the full collection and build with confidence.