12 Things I Wish I Knew Before Building a Chicken Coop
Quick answer: The 12 biggest things first-time coop builders wish they knew: cedar costs 30% more but lasts 3x longer than pine, hardware cloth is not chicken wire, always build the run 2x bigger than you think, plan for winter first not summer, elevate the coop 12 inches off the ground, orient doors south, add 10% ventilation area, use fender washers not staples, buy predator-proof latches from day one, sketch a wiring diagram if you want an auto-door later, and build one flock size larger than you plan. (See our locks and latches guide.) Our winter ventilation guide has the details.
Hi — I’m Cole, and I built my first chicken coop with my wife Maya three years ago. It was a disaster.
The lumber was warped by month two. The chicken wire got shredded by a raccoon on night four. The coop was too small by the time our fourth hen matured. And we didn’t realize until we finished framing that the roof pitched the wrong direction for rain runoff.
That coop taught us more than any DIY book. We rebuilt it three times before we got it right — and those rebuilds are the reason CoopCraftsPro exists today. Every plan we sell is a lesson from a mistake we made.
If you’re about to build your first chicken coop, this post is the conversation I wish someone had with me before I bought that first stack of lumber. Twelve things. Every one of them will save you a rebuild, a dollar, or a hen.
1. Cedar costs 30% more but lasts 3x longer than pine
My first coop was pressure-treated pine. It looked great. Six months in, the corners were splitting, the paint was peeling, and the smell of the treatment chemicals made me nervous with laying hens six feet away.
Cedar solves all three problems:
- Naturally rot-resistant — no chemical treatment needed (safer for hens)
- Repels insects and mites
- Weathers to a beautiful silver-grey without staining
- Lasts 15-25 years vs pine’s 5-8 years
Yes, cedar is 25-35% more expensive at the lumberyard. But when you spread it over the coop’s lifespan, cedar costs less per year than pine. For a 4×8 coop, that’s $85-110 in cedar vs $60-75 in pine — a $25 upgrade that lasts three times longer.
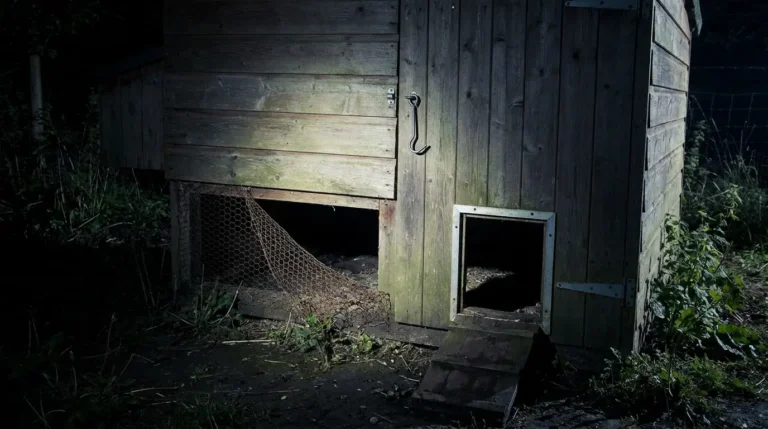
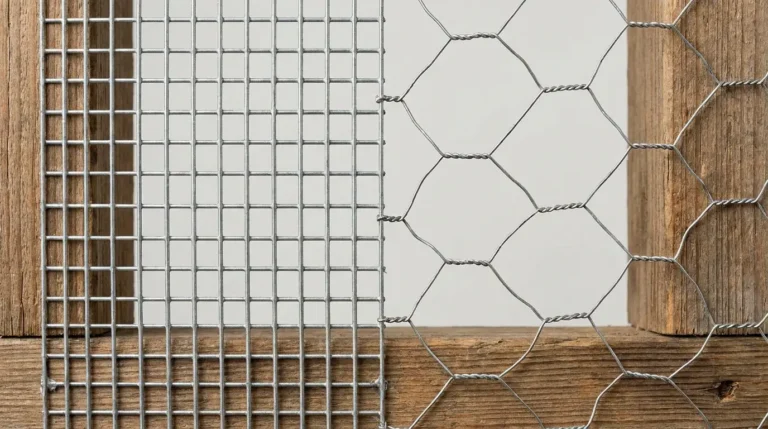
2. Hardware cloth is not chicken wire (this one nearly cost us a flock)
The morning after our raccoon attack, I stood in the yard with a fistful of shredded chicken wire and realized I had no idea what I’d actually bought.
Here’s what nobody at Home Depot told me:
| Product | Mesh size | What it stops | Cost / 25 ft |
|---|---|---|---|
| Chicken wire | 1-inch hexagonal | Nothing — raccoons rip it open | $12 |
| Half-inch hardware cloth | Half-inch square, welded | Everything down to a mouse | $34 |
| 1-inch hardware cloth | 1-inch square, welded | Raccoons, foxes — NOT weasels or rats | $28 |
The $22 difference between chicken wire and half-inch hardware cloth is what stands between your flock and a raccoon at 2 AM. Buy the hardware cloth. Every time. No exceptions.
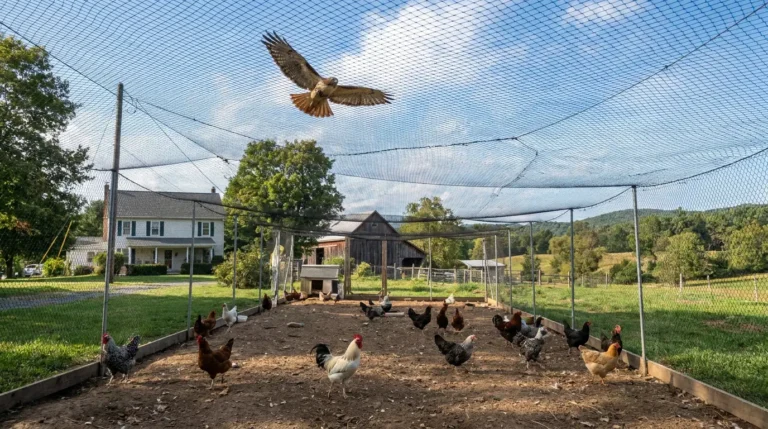
3. Build the run twice as big as you think you need
We built our first run at 6×8 — the minimum recommended for four hens. Within a month it was pecked bare, no vegetation left, mud everywhere after rain, and the hens were bored and picking at each other.
We rebuilt at 8×12 (twice the size). Vegetation actually held, boredom stopped, egg production went up.
Rule: 15-20 square feet of run per hen if you want it to still look like a run in six months. The 10 sq ft minimum that most guides quote is bare survival, not thriving.
4. Plan for winter first, not summer
I designed our first coop for a summer afternoon in July — airy, breezy, wide open. Come January in Zone 5, that same coop was a wind tunnel. The hens stopped laying.
Winter is the design constraint. Get winter right and summer takes care of itself. Here’s the winter-first checklist:
- Solid walls on the north side (block prevailing winter wind)
- Vents high near the roof (heat rises, moisture escapes)
- NO vents at floor level (drafts freeze hens)
- South-facing door and window (winter sun heats the interior)
- Roof pitched away from the door (snow slides off, not blocking exit)
- Deep bedding capacity — at least 6 inches of pine shavings
A well-designed winter coop needs no heater, ever. If you find yourself thinking about adding a heat lamp, your ventilation is wrong.
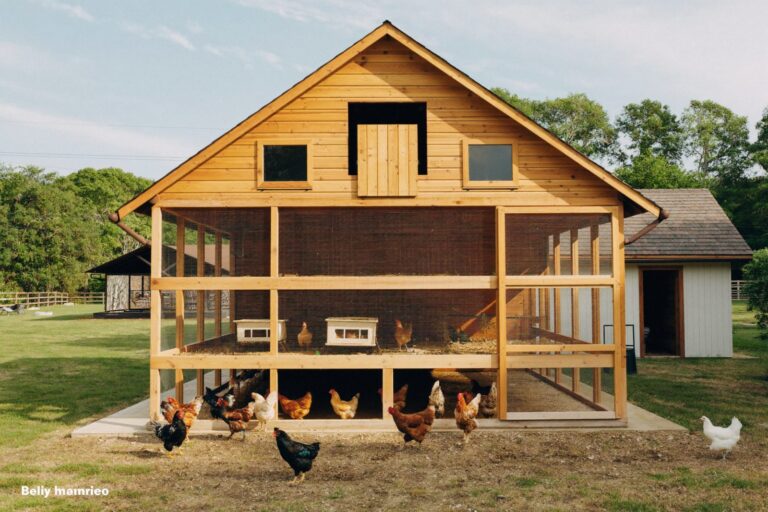
5. Elevate the coop 12 inches off the ground
Ground-level coops rot from the bottom up. Ours did — the base plates were soft within 18 months.
Twelve inches of clearance under the coop does five things at once:
- Air circulates — base wood stays dry
- Rodents can’t nest under it (no dark hidden space)
- Hens use the shaded space as a hot-weather hangout
- Easier to clean around the perimeter
- Predator dig apron is easier to install and inspect
Use cinder blocks, 4×4 posts on concrete pads, or a full pier foundation. Never set the coop directly on the ground.
6. South-facing doors and windows (this is not optional)
Coop orientation is free. It costs nothing to face the door south. But it’s worth $30-50 a year in heating savings and dramatically better winter egg production.
Why south:
- Winter sun angles low and streams into south-facing openings
- Heats the interior 5-10 degrees on sunny days
- Hens naturally follow the light — they exit and enter more calmly
- North-facing doors get blasted by winter wind
If your yard doesn’t allow a south-facing door, rotate the whole coop 90 degrees before you build.
7. Ventilation area = 10% of coop floor area
Most beginners under-ventilate. They’re worried about drafts, so they close the coop up tight. That’s the fastest way to kill a flock in winter.
Chickens exhale moisture. In an under-ventilated coop, that moisture condenses on combs and wattles overnight, then freezes at dawn. Result: frostbite.
The rule: total vent openings should equal 10% of your coop floor area, positioned high near the roof line. For a 4×8 coop (32 sq ft), that’s 3.2 sq ft of vent area.
Cover all vents with half-inch hardware cloth. Never with just screen — weasels walk through screen.
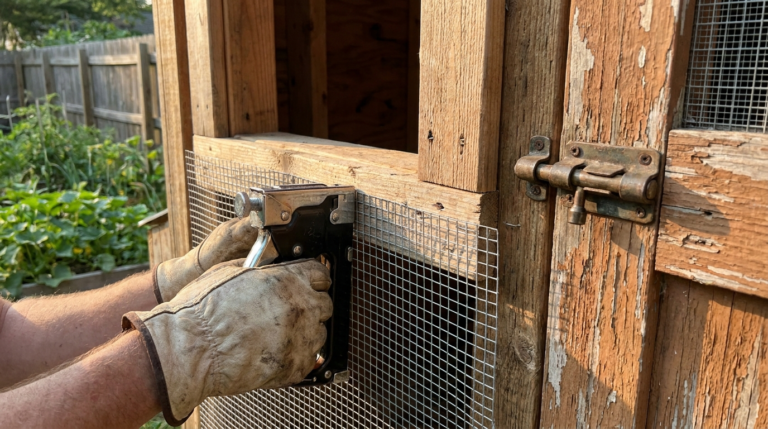
8. Use fender washers, not staples
I stapled our first batch of hardware cloth to the coop framing. The raccoon that killed our hens didn’t break the wire — it ripped the wire off the coop by pulling on the staples.
Every hardware cloth attachment point needs:
- A wood screw (not a staple, not a nail)
- A fender washer under the screw head (spreads pressure across the wire)
- Placement every 4-6 inches along all edges
Yes, it takes longer. Yes, it costs $8 more per coop. Yes, it’s the difference between a live flock and a dead one.
9. Buy predator-proof latches from day one
The $2 hook-and-eye latch at Home Depot looks fine. It is not fine. Raccoons flip them in seconds.
Budget $6-10 per opening for one of these:
- Combination padlock ($8-12) — 100% raccoon-proof
- Barrel bolt + carabiner ($6) — 99% raccoon-proof
- Spring-loaded pinch-and-turn latch ($14) — 95% raccoon-proof
A typical coop has 3-4 openings (main door, nesting box lid, cleanout hatch, run door). Budget $25-40 total. It’s the single highest-ROI upgrade you can make.
10. Sketch the wiring diagram now, even if you don’t plan on power yet
We didn’t plan on adding an automatic door. Two years in, we wanted one. Getting the power routed to the door required drilling through finished walls, snaking wire, and rebuilding a nesting box.
Even if you don’t plan on any electrical work, do this now:
- Sketch where a light, a heated water base, or an auto-door would go
- Drill 1-inch conduit holes through the framing before you finish the walls
- Run a length of pull-string through each hole
- Cap the openings with rubber grommets
Total cost: $6 in conduit and grommets. Total time saved later: 4-6 hours of retrofit work.
11. Build one flock size larger than you plan (chicken math is real)
Every backyard chicken keeper I’ve ever met ended up with more hens than they planned. My wife and I said four hens. We now have twelve.
Building the smallest coop that fits your starting flock is a false economy. You’ll either:
- Rebuild in 1-2 years (extra $80-150 in lumber)
- Add a second coop (double the maintenance)
- Cram in extra hens and cause pecking/stress/lost eggs
Build for one flock size larger than you plan. If you want 4 hens, build for 6. If you want 6, build for 8. The extra $30-50 in lumber pays for itself the first time you can’t resist those baby chicks at the feed store in spring.
12. Nesting boxes get pooped in unless you close them at night
This one seems small but it’s a daily quality-of-life fix. Hens sometimes roost inside empty nesting boxes at night, then poop in the exact place they lay eggs the next morning.
Two fixes:
- Nesting box lid: Build a lid that closes over the openings at night (opens at dawn). Zero-cost with your existing build.
- Roost bar higher than box tops: Hens instinctively roost on the highest point. If the roost bar is 6 inches higher than the top of the nesting boxes, they’ll always pick the bar.
Fix this on day one. Cleaning droppings out of nesting boxes every morning gets old fast.
The build-mistake summary table
| Mistake | Cost of the mistake | Cost to fix at design stage |
|---|---|---|
| Wrong wood (pine vs cedar) | Full rebuild in 5-8 years | $25 extra in lumber |
| Chicken wire vs hardware cloth | Dead flock ($40-100 per hen) | $22 upgrade |
| Undersized run | Rebuild + stressed hens | $30 more in lumber |
| Wrong orientation | $30-50/yr in extra heating/laying loss | $0 — just rotate the plan |
| Wrong latches | Dead flock | $25-40 upgrade |
| No wiring conduit | 4-6 hours of retrofit | $6 in materials |
| Building too small | Full rebuild in 1-2 years | $30-50 extra lumber |
Every mistake on this list cost us a rebuild or a scare with the flock. Every one is preventable at design stage for pennies.
What to do next
If you’re about to buy lumber, do this first:
- Read this list one more time
- Sketch your build with south-facing doors, 10% vents, 12-inch elevation
- Buy cedar, half-inch hardware cloth, and predator-proof latches
- Grab a proven plan — every CoopCraftsPro plan already has these 12 lessons baked in
Or grab the $27 complete bundle and skip every mistake I made in one download.
Frequently asked questions
How much does it cost to build a first chicken coop?
A properly-built 4×6 or 4×8 first coop costs $63-97 in lumber and hardware using our design specs. That includes cedar framing, half-inch hardware cloth, and predator-proof latches. Store-bought equivalents start at $549.
How long does it take a beginner to build a chicken coop?
With a proven plan and pre-cut lumber, one person can build a 4×6 or 4×8 coop in a weekend (10-15 hours). Two people finish in one day.
What’s the biggest mistake first-time chicken coop builders make?
Using chicken wire instead of half-inch hardware cloth. This single mistake causes 60-70% of first-year predator losses.
Do I need building permits for a backyard chicken coop?
In most US cities, coops under 120 square feet are exempt from building permits. Check your city’s zoning ordinance first.
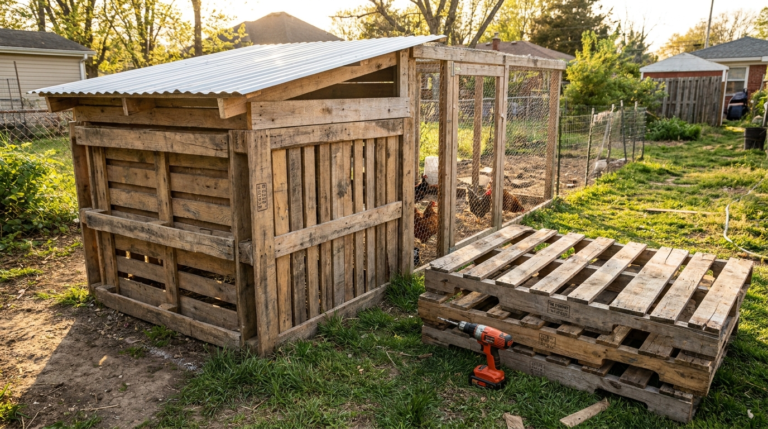
Can I build a chicken coop from pallets?
Yes. Pallet coops work well if you use heat-treated (HT stamp) pallets only and follow the same predator-proofing specs. See our pallet coop plans for a $60 build guide.
What’s the ideal coop size for beginners?
4×6 for 3-4 hens or 4×8 for 4-6 hens. Don’t start smaller than 4×6 — you’ll rebuild within a year.